
|
Milton Train Works™Custom kits and custom models |
A proud member of |
|
|
Milton Train Works™Custom kits and custom models |
A proud member of |
This page presents some construction images and additional information about the process of creating Tony the Tiger®.

Artwork courtesy of KCCUSA |
|
Original Art Many hours of planning were invested before the first Lego brick was laid. Estimates were made for the number of elements, colors, and types that would be needed to build a six foot tall model. The elements were sourced by MTW using Bricklink. Kellogg's supplied some artwork and small toy models of Tony. The team studied these items and a general pose was agreed upon that would give Tony a dynamic quality while not undermining the model's strength and stability. Design Study A 1/3 scale representation model of Tony was built with Lego. This miniature model was used as a guide in constructing the full sized version. This allowed the team to quickly investigate and iterate various stances and proportions. Construction of the full sized model by a small dedicated team of individuals took two months. |
|

Mini-Tony |

Steel Armature Design |
|
Armature Since the Tony the Tiger sculpture would be exposed to KCC visitors, a steel armature endoskeleton and base was designed and fabricated. The steel armature supports the model and the base resists tipping. Base The base was fabricated from wood, covered with automotive "speakerbox" carpet. Casters on the underside of the base allow the model to be moved, and a weight tray allowed insertion of additional weight for stability. |
|

Underside of Tony's base |
Week 1: Chris Leach checks |
|
Week 2: Mini-Tony guides |
|
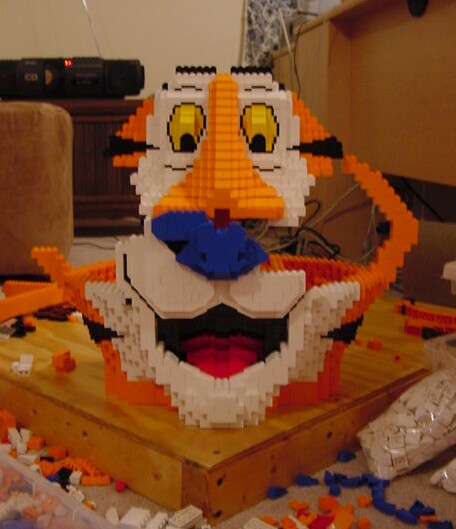
Week 3: Start of the head |
|
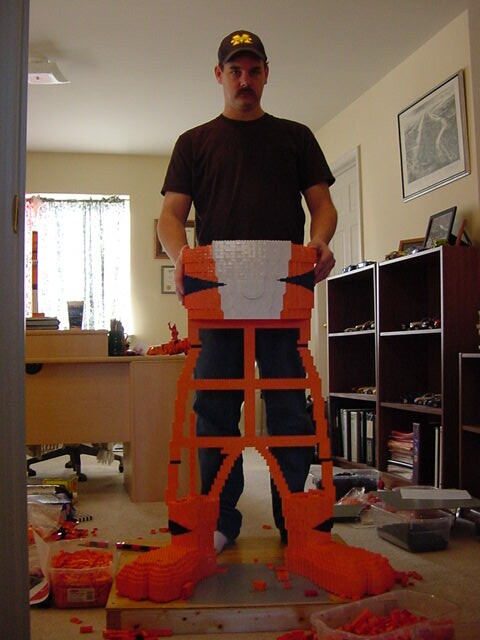
Week 4: Dave Laswell |
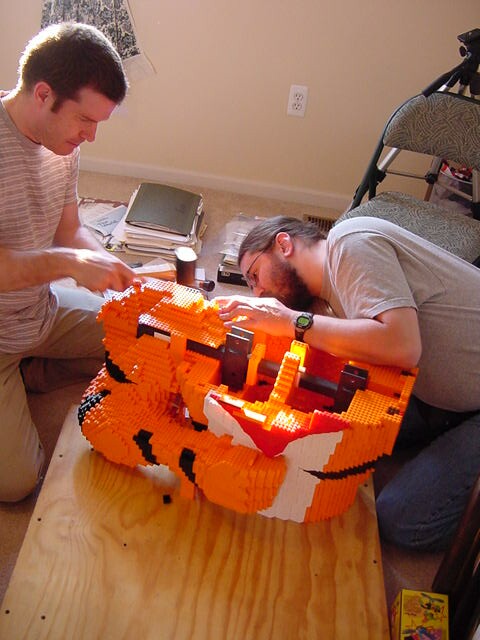
Week 5: Jim Garrett |
|
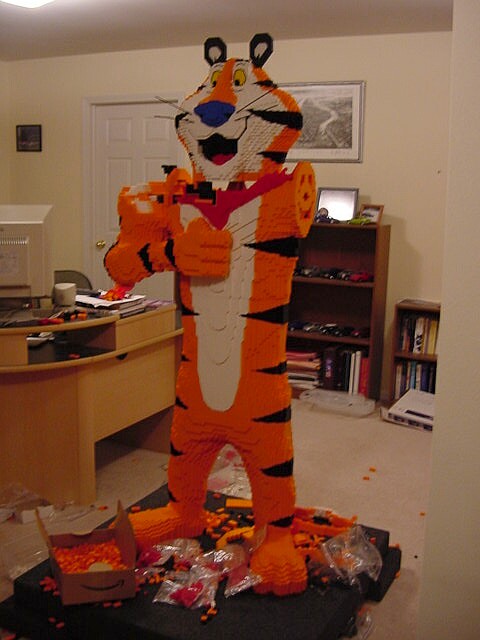
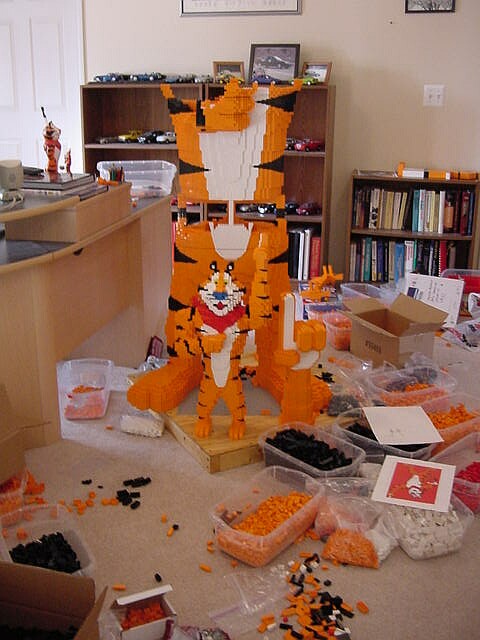
Week 6: Nearing completion |
|
Week 7: Steel armatures |
|
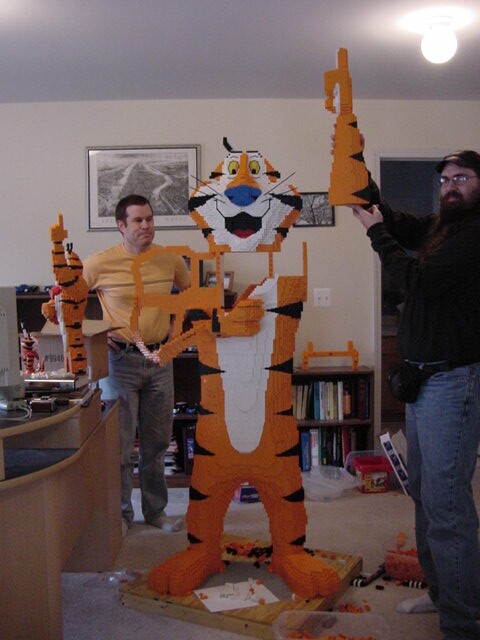
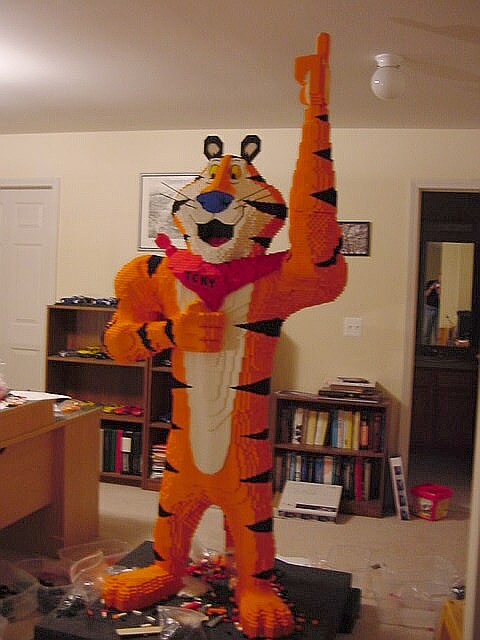
Week 8: Ready for Delivery! |

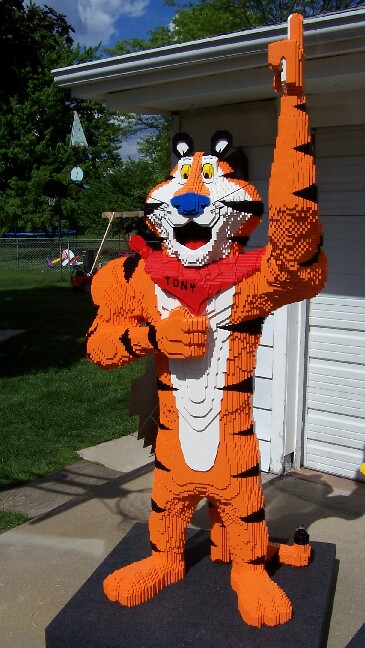
Tony® in context at KCCUSA |
|

Installed! whew! |
 |
LEGO® is a trademark of the LEGO Company, which does not sponsor, authorize or endorse this site. |
 |
MTW, Milton Train Works, MiltonTrainWorks.com, and the Milton Train Works logo are trademarks of Milton Train Works and Larry Pieniazek. All other text, images, and trademarks that appear under the www.miltontrainworks.com domain are the property of Larry Pieniazek unless specifically noted.
The Milton Train Works web site is hosted by Northstar Computer Systems.
Boilerplate Stuff…
Comments? suggestions? Flamage? Mail me!
Backgrounds courtesy of Fibblesnork™ (Copyright
held by by Todd Lehman)
Raytraced background scenery courtesy of Bram Lambrecht.
See disclaimer.
See our privacy policy.
This website features a Blank Page in accordance with to the recommendations
of the TPILB-Project.